S razresheniya Susan ot "The Wild Things" ya stavlyu ssilku na zamechatel'nii master class ot http://sushis-wild-things.blogspot.com/2010/09/10-steps-to-nice-eyelids.html.
Mne ochen' ponravilsay, a Vam?
Susan from The Wild Things present wonderful master class on eyelids for teddy's eyes, please visit her blog to see wonderful bear. http://sushis-wild-things.blogspot.com/
/ "... A lot of people had asked me how I make this or that and so I had the idea to write a few little tutorials from time to time.
Today I'll start with eyelids.
There are different ways to create them, but one way - which is very popular in Germany and I use for many years now, is to work with a poly resin which is called Fimo. I'm sure that you will find it also in other countrys. It's a fast, simple and cheap way for eyelids.
Step 1:
You need two crocodile clamps with metal feet (don't use plastic, it will melt in your oven) two glass eyes (no plastic) and Fimo.
You can mix with Fimo every color you like. For examle I mix black and brow to get a nice black color, which is not too dark. You can also mix white and black for fantastic grey.
Step 2
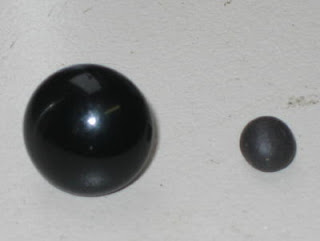
Take a little ball of Fimo - use the color you like and roll it in your hand until it is warm and smooth. The eye on the photo is 13mm/ 0.5" (to show you the proportion)
Step 3:
Press the little ball under the right or left side of the eye.
Step 4:
Mold with your fingers the outer corner of the eye.
Step 5:

Make another ball and start to scroll it on the table until you get an evenly spread roll of Fimo. Press it, so that you get a flat "roll".
Step 6:
Step 6:
Halve the Fimo roll and bring it up to your eye with the closed side on the eye corner and press the open ends under the other side of the eye.
Its very important that the roll is firmly fixed to the backside of the eye and the corner of the eye. Use the blunt side of a darning needle (be careful with the other side) to correct the shape.
Step 7:

Its very important that the roll is firmly fixed to the backside of the eye and the corner of the eye. Use the blunt side of a darning needle (be careful with the other side) to correct the shape.
Step 7:

You see your eyelid is nearly ready. Follow Fimos directions to dry it in the oven. (I put my eyes with the metal crocodil clamps into the oven, so that nothing can morph them.)
Step 8:
Step 8:
If everything is cooled down, take the eye carefully out of the lid.
Step 9:
Step 9:
Cut a small felt half moon and fix it with a drop of glue in the corner of the eyelid. You can also put a glue drop under the eye. Bring the glass eye back into the eyelid.
Step 10:

Congrats! Here are your new eyes with nice eyelids. My personal tip is to make every step first on the right side and then on the left side (or other way round. So you can see the diffrence between the eyes and its not to late to correct it.Step 10:

You can create every shape you like and you can also add lashes and keep it in position with the Fimo eyelid.
Enjoy!!!! .."/
I did a lot. Thank you , Susan


2 comments:
Наташенька, спасибо огромное за замечательную ссылку. Так просто и оригинально.
Thank you Natalia for adding my tutorial. Bear hugs from Susan
Post a Comment