Teddies / Friends for Adoption

Teddies / Friends for Adoption
TEDDY BEAR LOOKING FOR NEW HOMES
Showing posts with label tutorials. Show all posts

Friday, February 24, 2012

Learn how - to from Manuela


http://furrycrittersonlineworkshops.blogspot.com/2010/12/flugel-loten.html   How to make wings

Monday, October 17, 2011

Projects DIY from Stephanie / Сделай сам проэкты от Стефани

                                                       Under The Table and Dreaming
На любое событие, сезон или праздник проэкты и мастер классы в блоге у Стефани Лин


Скоро рождество и мне понравились эти сделай сам:
 календари, оформление вина и шарик на елку.

Думаю и вы сможете найти себе что-то интересное.

                   I like this one for coming Xmas season, but so much more different projects here:
                                              http://www.bystephanielynn.com/p/sponsors.html
                                    I am sure you will fine lots of ideas for yourself as well


                                            Хорошей и творческой недели Вам !
                                           Have a wonderful and creative week ahead!

Tuesday, August 2, 2011

So sweet tutorial from Gingermelon Dolls

This sweet tutorial for little girl hair, to keep from flying all around, and I think it can be use in different way as well, just turn on your imagination.
Shelly from Gingermelon Girls share it on her blog. I just like it, hope you like it too.


http://gingermelondolls.blogspot.com/2011/07/sweet-animal-barrette-tutorial.html#comments

Needle Book Tutorial

http://gingermelondolls.blogspot.com/2011/08/needle-book-tutorial.html

Sunday, June 12, 2011

Tutorials from Vivianne Galli

Vivianne Galli from The Old Pincushion share tutorial :
How to use the disc & cotter-pins:


You can see full tutorial with lots of picture on her blog
http://theoldpincushion.blogspot.com/2011/06/how-to-use-disc-cotterpins.html#comments

Thank you very much, Vivianne.

Vivianne having lots of specials in her Etsy shop if I'd not order my material I would buy this one
http://www.etsy.com/listing/73978164/vintage-looking-mohair-pack-plus-free

Have a nice Sunday everyone!

Tuesday, February 1, 2011

The Perfect Nose free workshop from Ebears - besplatno - krasivii nos

 Next Class Begins February 7th, 2010 Last Class!     This Workshop is Retiring.
http://www.kranbearys.com/Ebearz/Bears/Nose.htm  just register to access.
Join us in this fun and informative 'micro' class.


This class is designed for all students who want to learn how to embroider a beautiful nose on the snout of their bear.


A very inexpensive course to help you with that troublesome embroidered nose!

Supplies:
•A supply list is provided in the classroom.
•Purchase 1 skein of #5 pearl cotton in your choice of color in advance.

Next Class Begins February 7th, 2010
Course Fee: $0.00 USD

and she has few free tutorials on Agora forum.
http://www.ebearz.com/Agora/tiki-list_file_gallery.php

Tuesday, November 16, 2010

New free workshop coming on 4.12.2010 on EbearzU

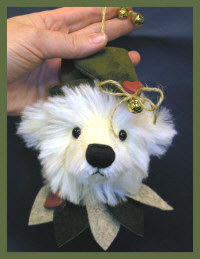
Hanging Around  toy for Christmas Tree

http://www.kranbearys.com/Ebearz/Seasonal/HangingAround.htm
to attend please register again, it's quick and all details on screen, just choose topic.
nado opyat' zaregistrirovatsa, no eto ochen' bisto, vsya informaciya na ekrane, prosto vibrat' kakoi kurs.


Make "Cookies and Cream" - free MK and sxema

http://www.artfire.com/users/kranbearys/blog/make-your-own-teddy-bear
and http://www.ebearz.com/Agora/tiki-list_file_gallery.php?galleryId=3
Free bear pattern of Cookie and Cream

Tuesday, September 28, 2010

10 Steps to nice eyelids


S razresheniya Susan ot "The Wild Things" ya stavlyu ssilku na zamechatel'nii master class ot http://sushis-wild-things.blogspot.com/2010/09/10-steps-to-nice-eyelids.html.


Mne ochen' ponravilsay, a Vam? 

Susan from The Wild Things present wonderful master class on eyelids for teddy's eyes, please visit her blog to see wonderful bear. http://sushis-wild-things.blogspot.com/


/ "...   A lot of people had asked me how I make this or that and so I had the idea to write a few little tutorials from time to time.
Today I'll start with eyelids.

There are different ways to create them, but one way - which is very popular in Germany and I use for many years now, is to work with a poly resin which is called Fimo. I'm sure that you will find it also in other countrys. It's a fast, simple and cheap way for eyelids.

Step 1:

You need two crocodile clamps with metal feet (don't use plastic, it will melt in your oven) two glass eyes (no plastic) and Fimo.

You can mix with Fimo every color you like. For examle I mix black and brow to get a nice black color, which is not too dark. You can also mix white and black for fantastic grey.

Step 2

Take a little ball of Fimo - use the color you like and roll it in your hand until it is warm and smooth. The eye on the photo is 13mm/ 0.5" (to show you the proportion)

Step 3:

Press the little ball under the right or left side of the eye.

Step 4:

Mold with your fingers the outer corner of the eye.

Step 5:


Make another ball and start to scroll it on the table until you get an evenly spread roll of Fimo. Press it, so that you get a flat "roll".

Step 6:


Halve the Fimo roll and bring it up to your eye with the closed side on the eye corner and press the open ends under the other side of the eye.

Its very important that the roll is firmly fixed to the backside of the eye and the corner of the eye. Use the blunt side of a darning needle (be careful with the other side) to correct the shape.

Step 7:

You see your eyelid is nearly ready. Follow Fimos directions to dry it in the oven. (I put my eyes with the metal crocodil clamps into the oven, so that nothing can morph them.)

Step 8:
If everything is cooled down, take the eye carefully out of the lid.

Step 9:

 
Cut a small felt half moon and fix it with a drop of glue in the corner of the eyelid. You can also put a glue drop under the eye. Bring the glass eye back into the eyelid.

Step 10:

Congrats! Here are your new eyes with nice eyelids. My personal tip is to make every step first on the right side and then on the left side (or other way round. So you can see the diffrence between the eyes and its not to late to correct it.


You can create every shape you like and you can also add lashes and keep it in position with the Fimo eyelid.

Enjoy!!!! .."/

I did a lot. Thank you , Susan


Thursday, July 29, 2010

FREE Basic Teddy boot camp - Besplatno !


http://www.kranbearys.com/Ebearz/index.htm

Basic Bear Boot Camp Next Class Begins August 1st, 2010A fun, month long series of adventures designed to hone your basic bear making skills. This class is suitable for both the novice bear maker and the more experienced bear-smith. A finely crafted basic bear is the best foundation for more advanced teddy bear art.


•12 Video Lessons with Sgt She-Bear

• Step by step Drills• Color Photos

• Agora Forum

• Full Size Pattern

• Teddy Parade

More than just a workshop ... you'll refer to these tips over and over again!


1.Pattern Prep

2.Nap, Fabric Choices & Cutting

3.Pinning & Sewing Techniques

4.Types of Joints and Techniques

5.Paws & Gussets that FIT!

6.The Art of Stuffing

7.Ears Made Easy

8.The Eyes Have It

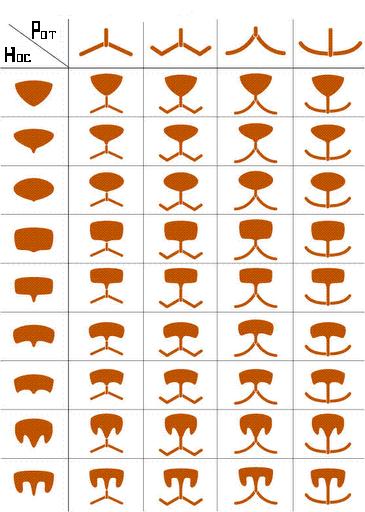
9.Pick Your Nose!

10.Shades of Enhancement

11.Grooming

12.Tying A Beautiful Bow

Supplies required: Please Note that this list is for a basic Beginner Bear. You may choose alternate supplies based on the information given in the Boot Camp. If you have supplies on hand...Great! If not, you may want to wait until the Camp begins to purchase them.


•1/4 yd mohair fabric in a color, density and pile-length of your choice. Mohair or a woven synthetic is preferable to a synthetic plush with a knit backing. Knit back synthetics will not produce as nice of a finished bear because the intended shape 'str-e-t-c-h-e-s during stuffing.

•1 pair 10 or 12 mm glass eyes in black or a color of your choice.

•An 8 inch square of felt or ultra-suede for your paw pads. Leather, suede or lined (interfacing) cloth is also acceptable.

•Pearl cotton for the nose. You'll only need about 48-60 inches.

•A 1 inch square section of black felt

•3 45 mm joints

•2 55 mm joints

I prefer to use fibre board joints with a lock nut and set screw arrangement for attaching the joint. You can use epoxy lock nut, lock nut or pop rivet joints if you like.

•A spool of polyester thread in a color to match your mohair. *

•A sheet of bristol or poster board for pattern template preparation and a glue stick. *

•Polyester fiber-fil stuffing. A bag can be purchased at your local craft store or Walmart.*

•Ribbon for a bow.*

Next Class Begins August 1st, 2010


Please check our featured supplier for our Basic Bear Boot Camp Supplies Teddy Bear Mohair. Check out their old, 'NEW' mohair. When it's gone ... It's gone!

Other suppliers can also be found on our Supplies Page in the left navigation.


Course Duration: 30 days.

Course Fee: FREE! Registration is Required.

Monday, July 26, 2010